A few years back, I helped a couple transform their living room with Shaw vinyl plank flooring, and the results were both stunning and surprisingly simple to achieve. That’s what I love about Shaw’s system, it’s built with everyday homeowners in mind. If you’re ready to update your floors and want a finish that looks high-end but installs without the stress, this is one route I’d strongly recommend. Below, I am going to guide you on everything I’ve learned over the years to help you get it right the first time.
Tools and Materials Needed
Essential Tools
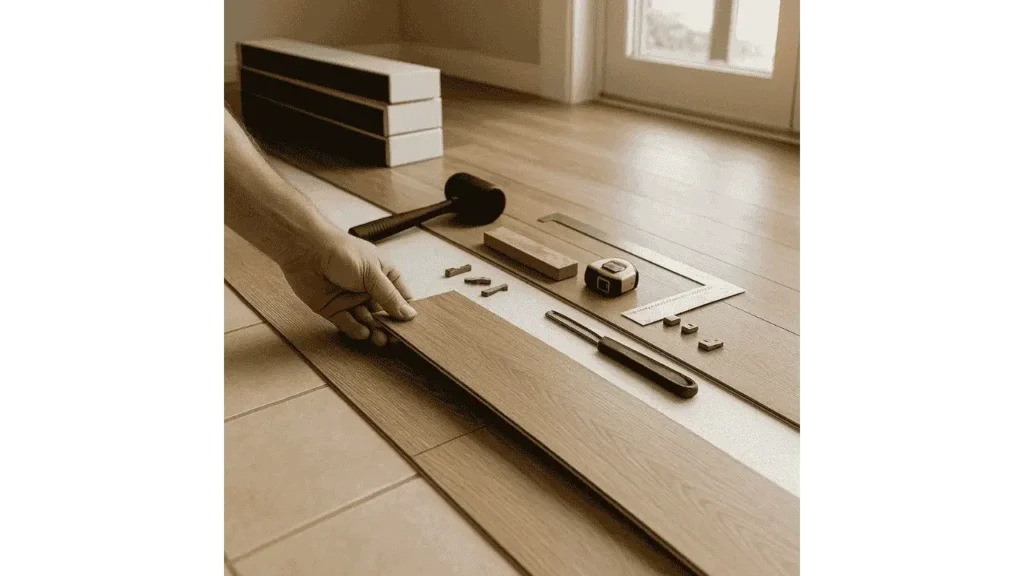
Before beginning the installation process, gather the necessary tools. A tape measure ensures accurate measurements for a precise fit. A utility knife is useful for making clean cuts and adjusting plank sizes. Make sure your blades are sharp to avoid ragged edges.
Additional Equipment
A straight edge helps in achieving straight cuts and aligning planks correctly. A rubber mallet aids in securing the planks together without causing damage. These help maintain clean seams and avoid splitting the interlocking joints.
Spacers and Tapping Block
Spacers are essential to maintain expansion gaps around the room’s perimeter. A tapping block is used to fit planks snugly together without damaging the edges. These small tools make a big difference in the final finish.
Learn More: How to Install a Wood Floor on a Concrete Slab?
Adhesive for Glue-Down Method
If opting for the glue-down installation method, having Shaw-approved adhesive on hand is crucial. Using the right adhesive ensures a strong bond and long-lasting durability.
“Using the proper tools and adhesives recommended by the manufacturer is key to avoiding costly flooring failures later,” says George Lyman, Certified Flooring Installer.
Preparing the Subfloor
Proper preparation of the subfloor is crucial for a successful installation. The subfloor must be clean, dry, and level. Remove any existing flooring that is damaged or uneven, and fill any cracks or holes with a leveling compound. If installing over concrete, ensure moisture levels are within acceptable limits by conducting a moisture test. Neglecting this step often leads to issues like peaking or gaps.
Acclimating the Flooring
Before installation, allow the Shaw vinyl planks to acclimate to the room’s temperature and humidity for at least 48 hours. This step prevents expansion or contraction post-installation and ensures a perfect fit. Store the boxes flat and unopened in the installation space for best results.
Installation Methods
Floating Installation
Shaw vinyl planks feature a click-lock system that allows for a floating floor installation without adhesive. Begin by placing spacers around the perimeter to maintain the expansion gap. Start laying planks from one corner, locking them together by aligning the edges and clicking them into place. Continue row by row, staggering the seams to create a natural look. Patience here results in a smoother, more seamless floor.
Glue-Down Installation
For areas with heavy foot traffic, glue-down installation provides added stability. Apply Shaw-recommended adhesive to the subfloor using a trowel. Carefully lay each plank, pressing it firmly into place and ensuring alignment. Use a weighted roller to secure the planks and remove any air pockets.
“Glue-down vinyl plank flooring offers better sound insulation and a more secure feel underfoot, especially in high-traffic zones,” notes Rachel Munroe, Interior Renovation Expert.
Cutting and Fitting the Planks
Measure the space carefully and cut the planks using a utility knife or flooring cutter. When cutting around corners or obstacles, take precise measurements to ensure a snug fit. Always stagger the joints for a natural and visually appealing layout. I recommend dry-laying a row or two before making final cuts.
Finishing Touches
Once all planks are installed, remove the spacers and install baseboards or molding to cover the expansion gaps. Clean the floor to remove any dust or debris from the installation process. If needed, touch up around door frames with matching caulk or trim.
Maintenance Tips
Maintaining Shaw vinyl plank flooring is simple. Regular sweeping and damp mopping with a manufacturer-approved cleaner will keep the floor looking new. Avoid using abrasive cleaners or excessive water to preserve the finish. I always suggest placing felt pads under furniture to prevent scuffs.
Final Takeaways
Installing Shaw vinyl plank flooring is something I’ve seen even first-timers pull off beautifully with just a little patience and prep. It combines durability with good looks and can completely change the feel of a room. With the right tools, the correct technique, and a bit of attention to detail, this flooring not only looks fantastic but it lasts. Follow the steps outlined above, and you’ll end up with a floor that feels like it was done by a pro, because in a way, it was: you.