
Wood floors add timeless beauty and warmth to any home, but even the most durable floors can suffer from accidental damage. Heavy furniture, dropped items, or daily wear and tear can cause unsightly gouges that disrupt the smooth surface of your floors. Fortunately, repairing a gouge in wood flooring is easier than you might think. With the right materials and techniques, you can restore your floor’s flawless appearance and protect it from future damage. This comprehensive guide will walk you through effective methods to fix gouges and keep your wood floors looking their best.
Assessing the Damage:
Before beginning any repairs, it’s important to evaluate the severity of the gouge. Shallow surface scratches may only require minor touch-ups, while deeper gouges need more extensive repair. By understanding the extent of the damage, you can choose the most effective repair method to restore the floor’s original look.
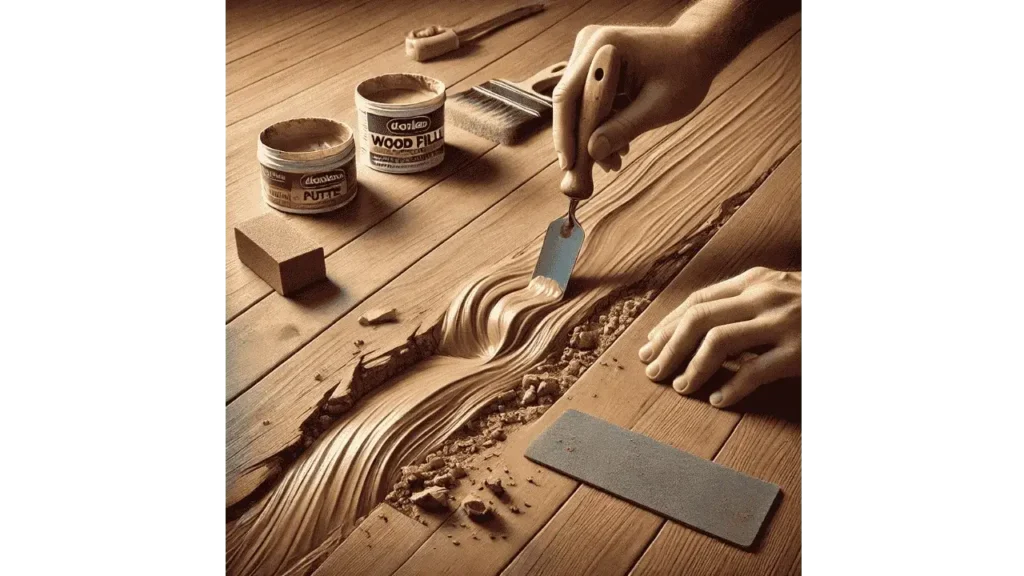
Materials and Tools Needed:
To repair a gouge in a wood floor, gather a color-matched wood filler or putty, a putty knife, fine-grit sandpaper (180-220 grit), a soft cloth, wood stain (if needed), and a clear polyurethane or floor sealant. Having these materials ready will make the repair process smoother and more efficient.
Step-by-Step Guide to Repairing a Gouge in Wood Flooring:
Clean the Damaged Area
Start by thoroughly cleaning the damaged area. Use a soft cloth to remove dust, dirt, and debris from the gouge. This ensures that the filler or putty will bond properly to the wood surface.
Learn More: Cleaning Wood Floors with Vinegar
Apply Wood Filler or Putty
Using a putty knife, carefully apply the color-matched wood filler or putty into the gouge. Press it firmly to fill the damaged area completely. Smooth out the surface so it is level with the surrounding floor. For deeper gouges, you may need to apply the filler in layers, allowing each layer to dry before adding the next.
Sand the Surface Smooth
Once the filler is completely dry, gently sand the repaired area with fine-grit sandpaper. Sand until the surface is smooth and flush with the rest of the floor. Be careful not to over-sand, as this could damage the surrounding finish.
Stain and Seal the Repair
If the repaired area does not perfectly match the rest of the floor, apply a matching wood stain to blend it seamlessly. After the stain dries, apply a thin coat of clear polyurethane or floor sealant to protect the repair and restore the floor’s finish. Allow the sealant to dry completely before using the area.
Read More: Fake Wood Flooring: Yes or No?
Alternative Methods for Minor Gouges:
For small gouges or scratches, wax repair sticks are a quick and effective solution. These sticks come in various wood tones and can easily fill in shallow marks. Blending markers can also help conceal minor scratches and blend the repair with the surrounding wood grain.
Preventing Future Damage:
To prevent future gouges, use felt pads under furniture legs and avoid dragging heavy items across the floor. Regular cleaning with a soft broom or vacuum designed for hardwood floors can also prevent dirt and debris from causing scratches.
Conclusion:
Repairing a gouge in your wood floor doesn’t have to be a daunting task. By following the right steps and using quality materials, you can restore your floor’s natural beauty and protect it from further damage. Whether dealing with minor scratches or deeper gouges, these simple repair methods will help you maintain the elegance and durability of your wood flooring for years to come.