
Taking on the task of removing tile from a wood subfloor might feel overwhelming at first, but with the right tools, techniques, and a clear plan, it’s entirely manageable. Whether you’re upgrading to a new flooring style or simply replacing old tiles, knowing how to remove them efficiently while preserving the wood subfloor underneath is crucial. This step-by-step guide will simplify the process, helping you achieve professional results with minimal hassle.
Understanding the Challenges of Tile Removal:
Tiles Bonded to Wood Subfloor
Tiles are often installed using adhesive or mortar, which bonds them tightly to the subfloor. Removing them without damaging the wood beneath requires care and precision.
Preparing for Dust and Debris
Tile removal is a messy job, with broken tile pieces and dust becoming unavoidable. Proper preparation and safety measures can save you from unnecessary cleanup and potential hazards.
Tools and Materials You’ll Need:
To make the process of removing tiles easier and more efficient, it’s essential to gather the right tools and materials before starting. A pry bar or chisel, paired with a hammer or mallet, will help lift the tiles effectively. For stubborn grout or adhesive, an oscillating multi-tool or rotary tool is invaluable.
Safety is key, so don’t forget to wear safety goggles, gloves, and a dust mask to protect yourself from flying debris and dust. To manage the mess, have heavy-duty garbage bags on hand for tile pieces and a vacuum or broom to keep the area clean as you work. Starting with the proper tools ensures the project runs smoothly and safely.
Steps to Remove Tile Floor from a Wood Subfloor:
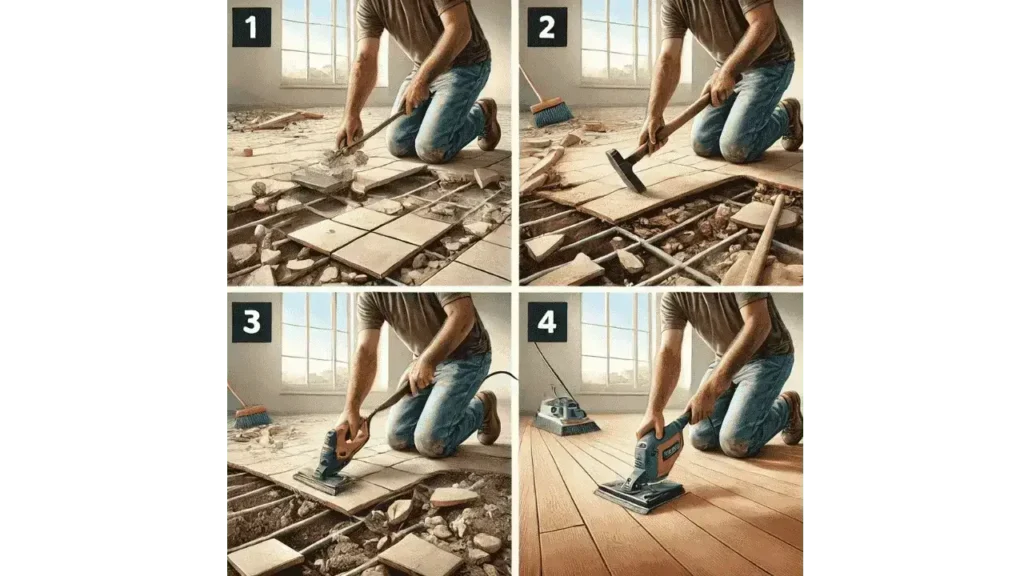
Step 1: Prepare the Area
Clear the room of furniture and other items. Cover vents and doorways with plastic sheets to minimize dust spread. Wear safety goggles, gloves, and a dust mask for protection.
Step 2: Remove the Grout
Use an oscillating multi-tool or grout removal tool to scrape away the grout around the tiles. This step helps loosen the tiles and prevents damage to adjacent ones during removal.
Step 3: Lift the Tiles
Start at a corner or edge of the floor. Use a chisel or pry bar to lift the first tile. Position the tool at an angle and gently tap with a hammer to dislodge the tile. Repeat for all tiles, working systematically across the room.
Step 4: Remove Adhesive or Mortar
Once the tiles are removed, you’ll likely find adhesive or mortar residue on the subfloor. Use a scraper or an oscillating tool with a scraping blade to remove this layer. Be careful not to gouge or damage the wood subfloor beneath.
Step 5: Inspect and Repair the Subfloor
After the adhesive is cleared, inspect the wood subfloor for damage. Fill in any gouges or holes with wood filler and sand the surface smooth. This ensures a clean base for your new flooring.
Tips for Easier Tile Removal:
Working in sections makes tile removal more manageable and less overwhelming. By focusing on smaller areas at a time, you can maintain better control over debris and ensure each section is thoroughly cleared before moving on.
Applying heat to stubborn adhesive using a heat gun or hair dryer helps to soften it, making the material more pliable and significantly easier to scrape off without damaging the wood subfloor beneath.
Properly disposing of debris is crucial to keeping the workspace safe and clean. Use heavy-duty garbage bags to hold tile pieces and dust securely, preventing tears and spillage during cleanup or transport.
Conclusion:
Removing tile from a wood subfloor may seem challenging, but with careful preparation and the right tools, the process becomes much more manageable. By following these steps, you can ensure the wood subfloor remains intact and ready for its next purpose. Whether you’re planning to install new tiles, hardwood, or another flooring type, taking the time to remove the old tiles properly will set the stage for a successful renovation.